Category: Secure Software Supply Chain
-

Enriching Container Images with OCI Annotations for Supply Chain Security and Vulnerability Management
Annotations have been part of the Open Container Initiative (OCI) specification since version 1.0.0 dating back to 2017. However, their more extensive use saw uptick only recently – mainly with the proliferation of certified and hardened images and the increased need for supply chain security and vulnerability management. OCI annotations allow you to enrich the…
-
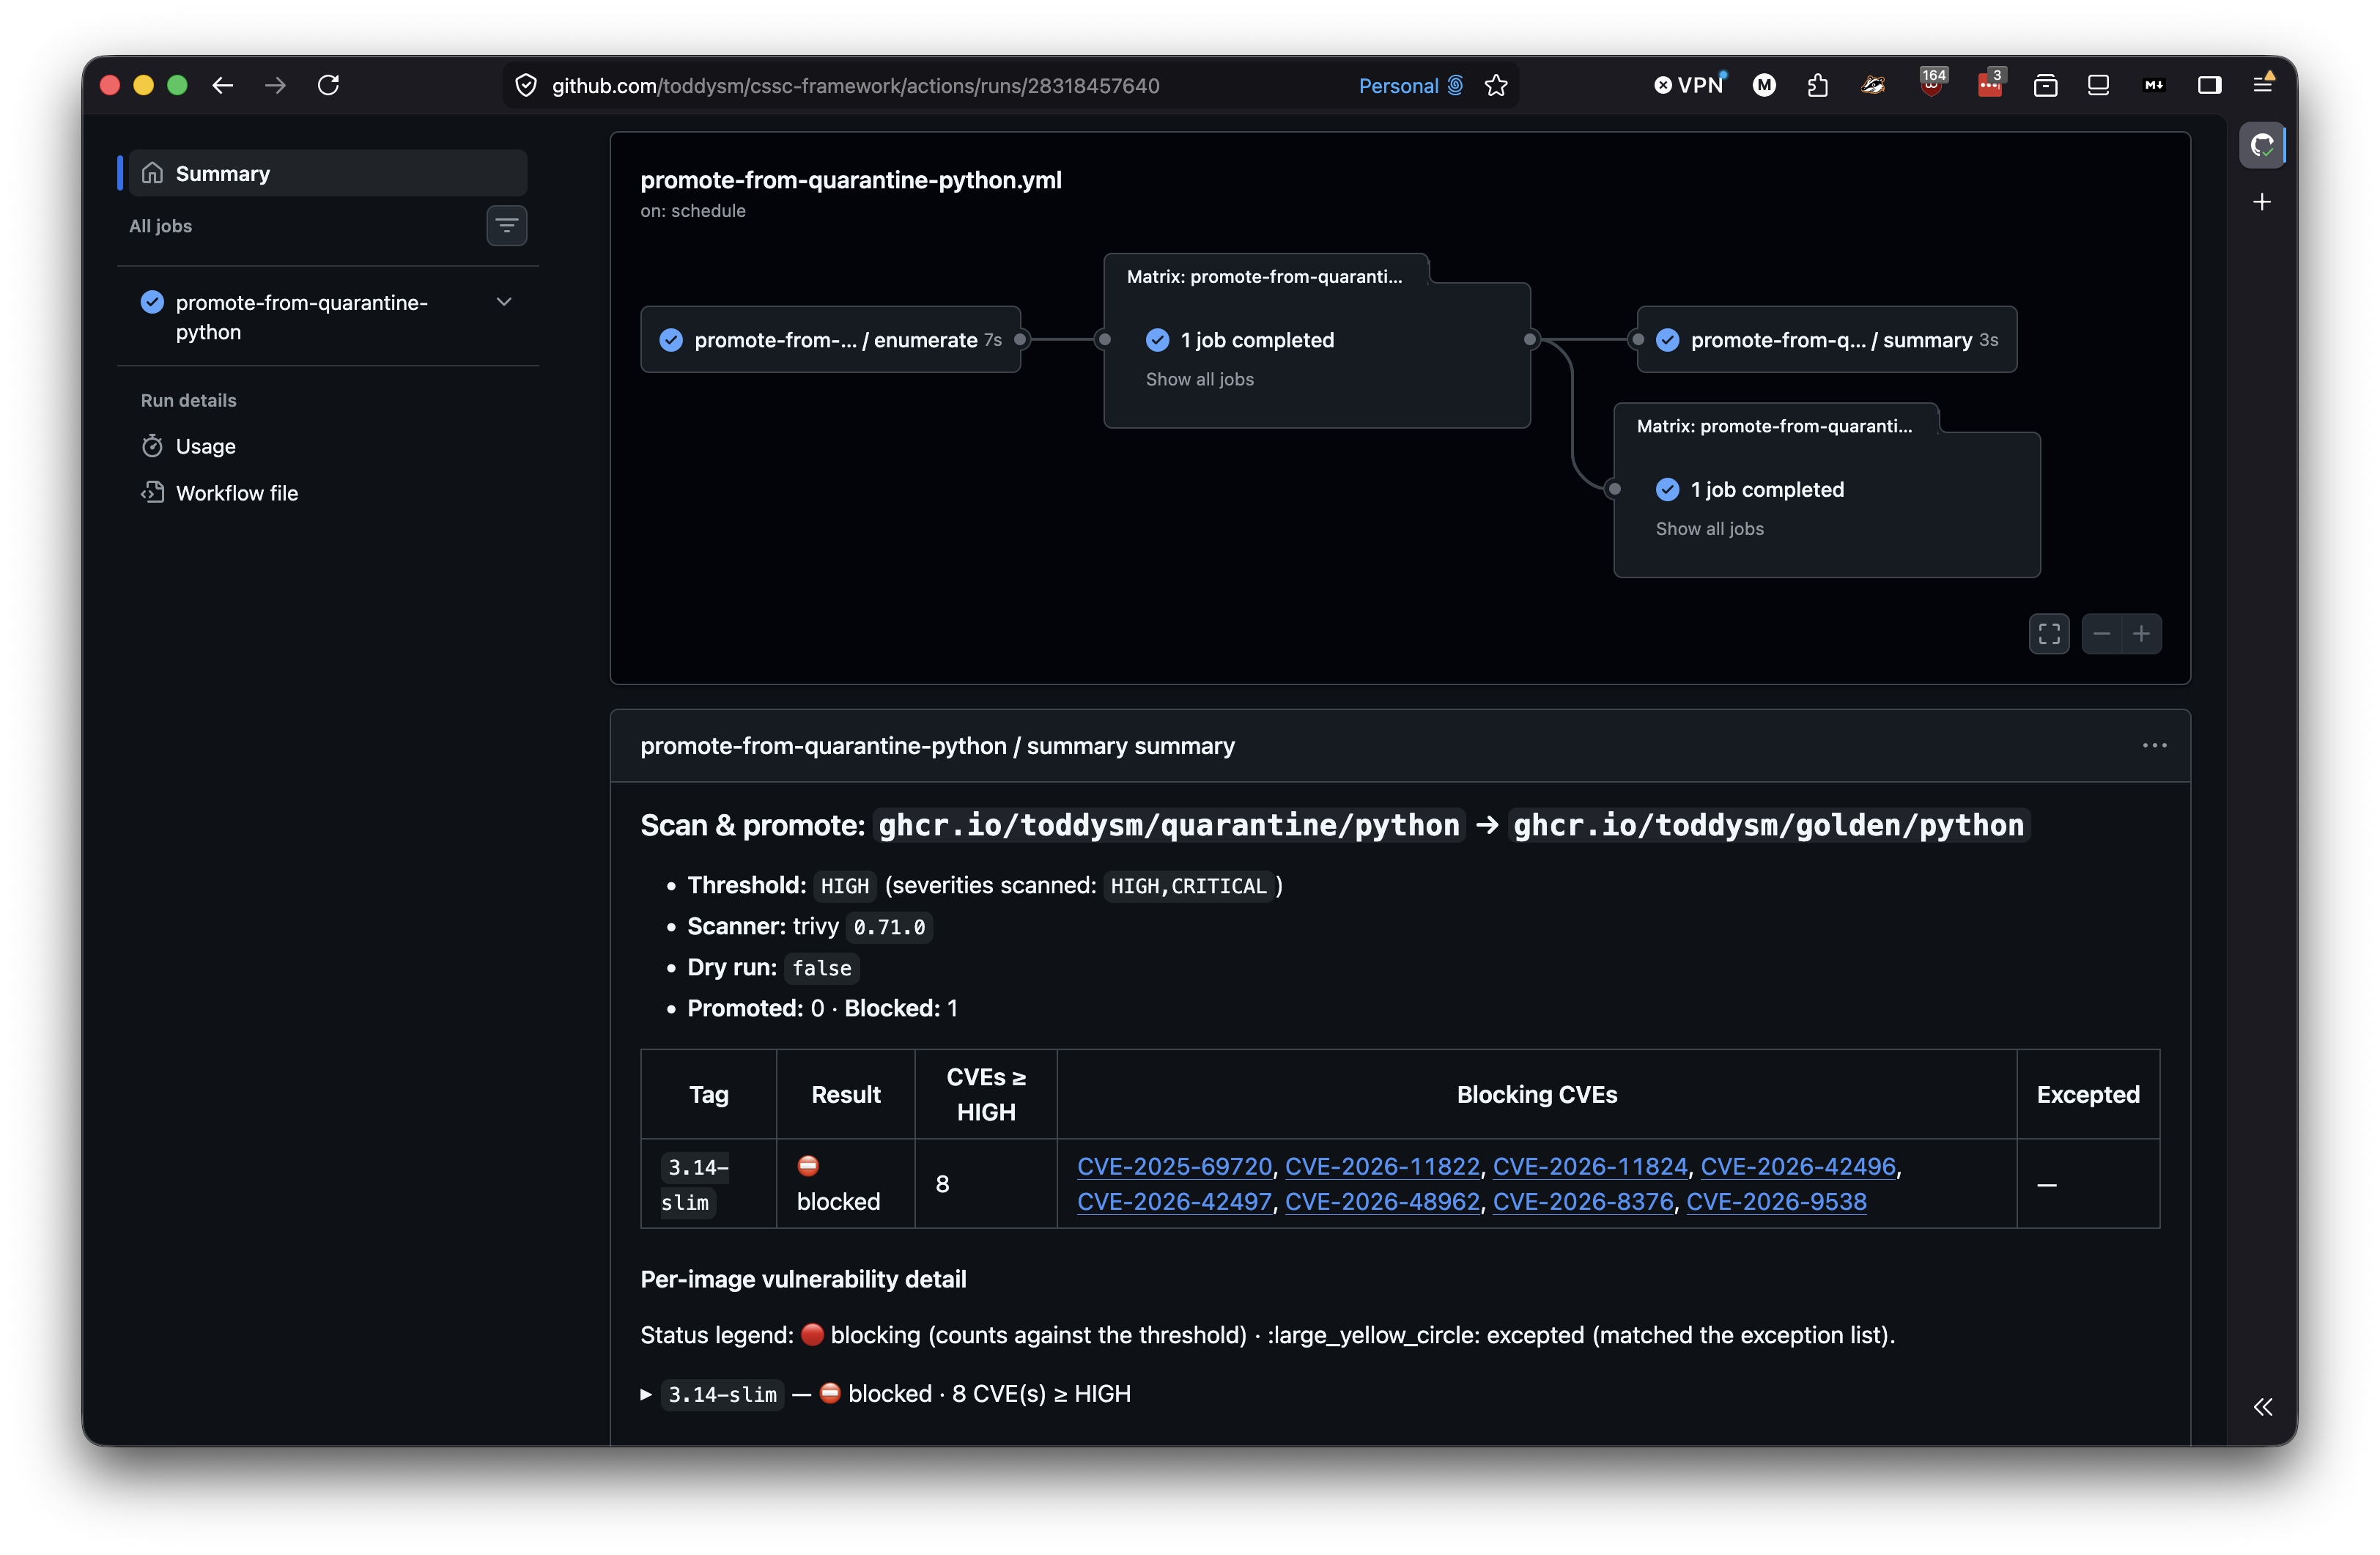
Implementing Approval Workflow for Promoting Quarantined Container Images
In previous posts I described how you can implement a GitHub actions to mirror and quarantine images from Docker Hub, promote images from quarantine to golden registry if they meet the vulnerability threshold as well as how to break down the monolithic GitHub actions implementation into reusable components. However, the biggest problem with this approach…
-

Re-disigning the Monolithic GitHub Workflow for Promoting Images from Quarantine
Yesterday I posted about Promoting Container Images from Quarantine Using GitHub Actions describing a simple way to do a Trivy vulnerability scan and promote the image if it passes the vulnerability threshold. However, the problem with that workflow was that it was too monolithic. While the monolithic workflow does the work, I wanted to have a…
-

Promoting Container Images from Quarantine Using GitHub Actions
A few days ago, I posted about Mirroring Container Images from Public Registries Using GitHub Actions, which is one of the first thing you need to think about when securing the supply chain for containers and cloud-native artifacts. The next step is to validate those artifacts before promoting them for internal use. As explained in that…
-

Mirroring Container Images from Public Registries Using GitHub Actions
While working on my vibe coding project to implement containers’ supply chain workflows system, I decided to also replicate the experience that many enterprises currently have and implement the workflows using traditional CI/CD tools. As part of that I will also walk through the common scenarios for containers’ supply chain security. One of the common…
-
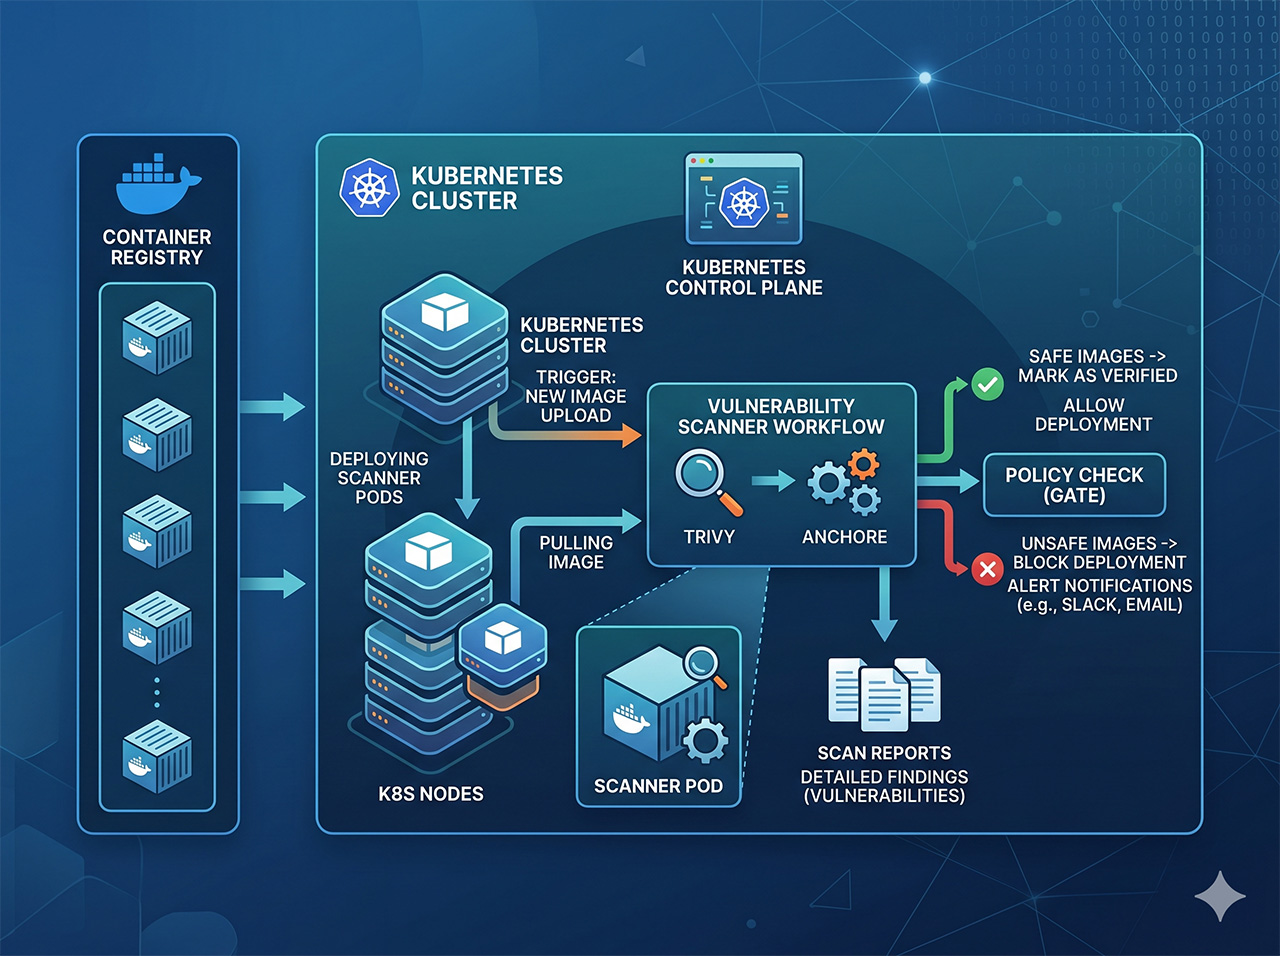
Why Supply Chain Security Belongs in Your Registry, Not Your CI/CD?
For the past five years, I’ve worked on supply chain security for containers and cloud-native workloads, and I’ve had the same conversation with security-conscious enterprises over and over. They don’t want their developers – or, now, their AI agents – pulling insecure images directly from public registries. Over those conversations, several clear patterns for securing the…
-

Using OCI Annotation to Track Container Image Lifecycle
For a while, we’ve been exploring the idea of using OCI annotations to track the lifecycle of container images. The problem we are trying to solve is as follows. Container images are immutable and cannot be dynamically patched like virtual machines. To apply the latest updates to a containerized application, teams must produce a new…
-

OCI Artifact Manifests, OCI Referrers API and Their Support Across Registries (Part 1)
[UPDATE: 2023-03-26] When I wrote this post, the expectation was that OCI will release version 1.1 of the specification with artifact manifest included. This release was supposed to happen by end of Jan 2023 or mid Feb 2023. Unfortunately, the OCI 1.1 Image Spec PR 999 put a hold on that and as of today,…
-

Implementing Containers’ Secure Supply Chain with Sigstore Part 3 – Ephemeral Keys and Artifact Promotion
In the last post of the series about Sigstore, I will look at the most exciting part of the implementation – ephemeral keys, or what the Sigstore team calls keyless signing. The post will go over the second and third scenarios I outlined in Implementing Containers’ Secure Supply Chain with Sigstore Part 1 – Signing…
-

Implementing Containers’ Secure Supply Chain with Sigstore Part 2 – The Magic Behind
In my previous post, Implementing Containers’ Secure Supply Chain with Sigstore Part 1 – Signing with Existing Keys, I went over the Cosign experience of signing images with existing keys. As I concluded there, the signing was easy to achieve, with just a few hiccups here and there. It does seem that Cosign does a…